typeORM カラムの追加時の並び順を調整する
OverView
descriptionカラムを追加したい。created_at,updated_atの前に追加したい
MySQL使用
import {
  Column,
  CreateDateColumn,
  Entity,
  PrimaryGeneratedColumn,
  UpdateDateColumn,
} from 'typeorm'

@Entity()
export class Users{

  @PrimaryGeneratedColumn('increment')
  readonly id!: number

  @Column({ name: 'name' })
  readonly name!: string

// Add
  @Column({ name: 'description' })
  readonly name!: string

  @CreateDateColumn({ name: 'created_at' })
  readonly createdAt!: Date

  @UpdateDateColumn({ name: 'updated_at' })
  readonly updatedAt!: Date

}
Problem
Entitiyの順番になると思ったら、追加したdescriptionカラムがupdated_atの後ろ、最後尾に位置してしまった
typeORMにカラムの順番を指定するオプションはなさそう
公式関連issue
https://github.com/typeorm/typeorm/issues/7687
https://github.com/typeorm/typeorm/issues/541
How to solve
調べても対処法が見つからなかったのでmigrationファイルを直接編集したらできた👏
通常とおりmigrationファイルを生成する。
npm run typeorm migration:generate -- -n AddDescriptionColumnToUser生成されたmigrationを編集
AFTER [カラム名]を追加npm run typeorm migration:run
import { MigrationInterface, QueryRunner } from 'typeorm'

export class AddDescriptionColumnToUser1234567
  implements MigrationInterface {
  name = 'AddDescriptionColumnToUse1234567r'

  public async up(queryRunner: QueryRunner): Promise<void> {
    await queryRunner.query(          // AFTER [カラム名] を追加
      'ALTER TABLE `users` ADD `description` varchar(255) NOT NULL AFTER `name`',
    )
  }

  public async down(queryRunner: QueryRunner): Promise<void> {
    await queryRunner.query('ALTER TABLE `uers` DROP COLUMN `description`')
  }
}
NestJS with TypeORM Migrations
OverView
- NestJS * TypeORM
- Adding table columns using CLI
- ts-node and typeorm are already installed
How to
(1. Create an entity)
2. Adding table columns
3. Create a new migration
4. Run migrations
Adding table columns / Edit entity file
import { Entity, Column } from "typeorm";

@Entity()
export class User{

    @Column()
    id: number;

    @Column()
    name: string;

    // Add
    @Column()
    description: string;
}
Create a new migration
"scripts": {
    ...
    "typeorm": "node --require ts-node/register ./node_modules/typeorm/cli.js"
}
npm run typeorm migration:generate -- -n AddDescriptionColumnToUser
it creates migration file
Run migrations
npm run typeorm migration:run
Done 👏
Other Commands
Revert migrations
npm run typeorm migration:revertShow migrations
npm run typeorm migration:showDrop database schema ※ To dompletely drop a database schema ☠️
npm run typeorm schema:drop
Links
【React】ボタンをクリックすると特定のフォームまで自動スクロールする
概要
「問い合わせ」ボタンをクリックすると、ページ最下部の問い合わせフォームまで自動スクロールする
useRefでDOMノードにアクセスし、scrollIntoViewでスクロールする
export function Contact(): JSX.Element {
  const ref = useRef < HTMLDivElement > null;
  const executeScroll = () => {
    ref?.current?.scrollIntoView({
      behavior: "smooth",
    });
  };

  return (
    <Box>
        <Button onClick={executeScroll}>お問い合わせはこちらから</Button>

     ~~~~

      <Box ref={ref}>
        <Text>お問い合わせフォーム</Text>
      </Box>
    </Box>
  );
}
NestJSでCORSを許可する
エラー
Frontend: Next.js
Backend: NestJS
で開発中にエラーが

Access to XMLHttpRequest at 'http://localhost:3001/tasks'
from origin 'http://localhost:3000' has been blocked
by CORS policy: No 'Access-Control-Allow-Origin' header
is present on the requested resource.
エラーの原因
'http://localhost:3001/tasks' from origin 'http://localhost:3000' has been blocked by CORS policy:
localhost:3000からlocalhost:3001へのリクエストはCORSポリシーによりブロックされたとのこと
CORSとは
オリジン間リソース共有 (CORS) - HTTP | MDN
オリジン間リソース共有 (Cross-Origin Resource Sharing, CORS) は、追加の HTTP ヘッダーを使用して、あるオリジンで動作しているウェブアプリケーションに、異なるオリジンにある選択されたリソースへのアクセス権を与えるようブラウザーに指示するための仕組みです。ウェブアプリケーションは、自分とは異なるオリジン (ドメイン、プロトコル、ポート番号) にあるリソースをリクエストするとき、オリジン間 HTTP リクエストを実行します。
オリジン間リクエストとは、例えば https://domain-a.com で提供されているウェブアプリケーションのフロントエンド JavaScript コードが XMLHttpRequest を使用して https://domain-b.com/data.json へリクエストを行うような場合です
対処法
No 'Access-Control-Allow-Origin' header
is present on the requested resource. とあるので、Access-Control-Allow-Originをヘッダーにつけてあげる
import { NestFactory } from '@nestjs/core';
import { AppModule } from './app.module';

async function bootstrap() {
  const app = await NestFactory.create(AppModule);

// 追加
  app.enableCors({
    origin: '*',
    allowedHeaders: 'Origin, X-Requested-With, Content-Type, Accept',
  });
// ここまで

  await app.listen(3001);
}
bootstrap();
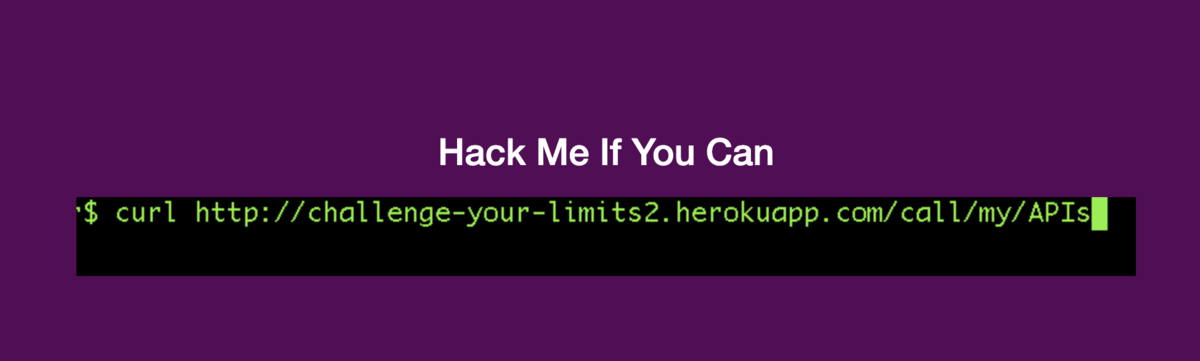
Hack Me If You Can
今更ながら、下位10%のダメなエンジニアにだけ解けないパズルを解いてみました。 curlは普段使わないので練習になりました
Puzzle for Software Engineer 2
このとおりに叩く
❯ curl http://challenge-your-limits2.herokuapp.com/call/my/APIs
{"error":"Ok. Let's get started! End Point is correct. But HTTP Method should be..."}
HTTP MethodがGETじゃない。POSTにしてみる
❯ curl -X POST http://challenge-your-limits2.herokuapp.com/call/my/APIs
{"error":"Nope. Keep trying. End Point is correct"}
~
また違う
❯ curl -X DELETE http://challenge-your-limits2.herokuapp.com/call/my/APIs
{"message":"Well done! haha! Surprised?
Yeah, the answer was DELETE.
Ok. Next === /c2_users/:id/hacker_apply"}
DELETEだった。
❯ curl http://challenge-your-limits2.herokuapp.com/c2_users/:id/hacker_apply
{"error":"Please authenticate using Basic Auth with your username and password.
You want a clue?
Shout out 'help/me/out'"}
Basic認証が必要とのこと。何も登録してないので、メッセージに沿って助けを請うてみる
❯ curl http://challenge-your-limits2.herokuapp.com/help/me/out
{"message":"By the way, Have you already registered?
This is the clue only for REGISTERED user.
You should have your id before you check the clue.
If you don't, go to /c2_users/ and register.
Hey, Registered users!
Here you go. === bit.ly/1T8gVdG ===
You don't know about 'bit.ly'? Google it!"}
~
ユーザー登録してidが必要だよとのこと。とりあえずPOSTしてみる
❯ curl -X POST http://challenge-your-limits2.herokuapp.com/c2_users/
{"error":"Validation Error - [:username, \"can't be blank\"]"}
usernameが必要と。前回のクイズ同様emailも合わせて登録してみる。
❯ curl -X POST -d"username=name&email=apoidgaji@example.com" http://challenge-your-limits2.herokuapp.com/c2_users/
{"id":4272,"username":"name","email":"apoidgaji@example.com","password":"dRTVOWjAUktfCyxc","comment":null,"created_at":"2021-11-01T05:59:53.709Z","updated_at":"2021-11-01T05:59:53.709Z"}
登録できた! さっきエラーになった箇所をBasic認証で試してみる。
❯  curl -u name:dRTVOWjAUktfCyxc http://challenge-your-limits2.herokuapp.com/c2_users/:id/hacker_apply
{"error":"Your id is a bit weird. Can you check it?"}
~
idがおかしいとのこと。さっき生成されたIDをurl中に含める
❯  curl -u name:dRTVOWjAUktfCyxc http://challenge-your-limits2.herokuapp.com/c2_users/4272/hacker_apply
{"message":"Awesome! Can you come over here? === R29vZCBqb2IhISBQbGVhc2UgYWNjZXNzIHRvIHRoZSB1cmwgZnJvbSB5b3VyIHdlYiBicm93c2VyLiA9PT0gXApodHRwOi8vY2hhbGxlbmdlLXlvdXItbGltaXRzMi5oZXJva3VhcHAuY29tL3dpbm5lcl9jb21tZW50cy81SU9oaF9UUDFuMFAtNlNJ      You want a clue? Shout out 'give me a clue'"}
~
できた!けど、なんの文字の羅列かわからない。ヒントを貰う。
❯ curl http://challenge-your-limits2.herokuapp.com/give/me
/a/clue
{"error":"Don't forget to say 'please'"}
~
Pleaseをつけろと注意される😩
❯ curl http://challenge-your-limits2.herokuapp.com/please/give/me/a/clue
{"message":"Here you go === bit.ly/1MWLnZr === You don't know about 'bit.ly'? Google it!"}
指定のページに飛ぶ。
デコードしろってことなので、
❯ echo -n 'R29vZCBqb2IhISBQbGVhc2UgYWNjZXNzIHRvIHRoZSB1cmwgZnJvbSB5b3VyIHdlYiBicm93c2VyLiA9PT0gXApodHRwOi8vY2hhbGxlbmdlLXlvdXItbGltaXRzMi5oZXJva3VhcHAuY29tL3dpbm5lcl9jb21tZW50cy9tV1VmaHo2Qkp2ZW5UbldI' | base64 -D
Good job!! Please access to the url from your web browser. === \
http://challenge-your-limits2.herokuapp.com/winner_comments/mWUfhz6BJvenTnWH
~
❯
できた!
'type' カラムの追加でエラー
typeカラムを追加したらエラーが
実務で既存のテーブルに新たに「種別」を示すカラムを追加したく、typeというカラムを追加しました。
※参考コードは実務のではなく適当なサンプルです。
class AddTypeToPayment < ActiveRecord::Migration[5.1]
  def change
    add_column :payment, :type, :integer, null: false, default: 0
  end
end
rails db:migrateも正常に終わったものの、カラムを追加したテーブルを参照しているページでエラーが。
ActiveRecord::SubclassNotFound: The single-table inheritance mechanism failed to locate the subclass: '0'.
This error is raised because the column 'type' is reserved for storing the class in case of inheritance.

Please rename this column if you didn't intend it to be used for storing the inheritance class or overwrite ActiveRecordModel::Payment.
inheritance_column to use another column for that information.

from /usr/local/bundle/gems/activerecord-5.1.4/lib/active_record/inheritance.rb:196:in `rescue in find_sti_class'
'type'カラムは予約語だから、名前を変えてね。とのこと。
Railsガイドにも記載がありました。知らなかった。
これらのカラム名は必須ではありませんが、Active Recordで予約されています。特別な理由のない限り、これらの予約済みカラム名の利用は避けてください。たとえば、typeという語はテーブルでSTI(Single Table Inheritance)を指定するために予約されています。STIを使わない場合であっても、予約語より先にまず「context」などのようなモデルのデータを適切に表す語を検討してください。
CI環境と開発環境でDBパスワードが異なる場合
CI上のパスワードは空でOK, 開発環境上はcredentialでパスワードを設定しています。
以前は開発環境だけで読み込めるようにgem 'dotenv-rails'を使用してパスワードを設定し、Github上にはそのパスワード環境変数をpushしないことでCI上にはパスワードが空になるようにしていました。
酷い力技だったので、わかりやすいように修正しました。
jobs:
  build:
    docker:
      - image: circleci/ruby:2.7.2-node-browsers-legacy
        environment:
          - BUNDLER_VERSION: 2.1.4
          - RAILS_ENV: 'test'
          - DB_HOST: 127.0.0.1
          - LANG: 'ja_JP.UTF-8'
          - TZ: "Japan"
      - image: circleci/mysql:5.7
        environment:
          - MYSQL_ALLOW_EMPTY_PASSWORD: 'true'  # ここ
          - MYSQL_USER: root
          - MYSQL_DB: ci_test
# 略

test:
  <<: *default
  database: ci_test
  host: <%=ENV['DB_HOST'] || '127.0.0.1' %>
  password: <%= Rails.application.credentials.development[:password] %> ##ここ
対処法
database.yml.ciを用意
# 略

test:
  <<: *default
  database: ci_test
  host: <%=ENV['DB_HOST'] || '127.0.0.1' %>
  password: "" #空にする
本来使用するdatabase.ymlからdatabase.yml.ciを入れ替え
      # DBのセットアップ
      - run:
          name: Database Setup
          command: |
            rm ./config/database.yml # ここ
            mv ./config/database.yml.ci ./config/database.yml # ここ
            bundle exec rake db:create
            bundle exec rake db:schema:load